Daily Books will display detailed information from the end of day (EOD) report processed by the location’s point of sale (POS) system consisting of fuel sales, c-store sales, receipts, and fuel inventory.
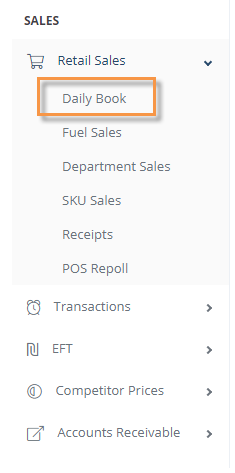
The Daily Books page can be found in the Navigation Bar under the Sales section, click the Retail Sales dropdown menu and select the Daily Books link to access Daily Reconciliation.
When you open Daily Books, a search window will appear.
Using the search tool, specify a date or date range and store(s) of sales information provided by the POS to review or manage.

- Search icon in the title bar available to change daily book date or store view.
- Start date and end date (Required). Use the same start/end date to view and manage 1 sales day. Use a range between the start/end to view a summary of multiple sales days at a time.
- Select a store to manage the daily book day or multiple store to view the summary of the daily book days.
- Click to process the search filters selected.
The Daily Books window will open and display a summary of the sales detail based on the filters applied in the search tool.
NAVIGATING THE DAILY BOOKS HEADER TOOL BARS
The Title Bar – Located at the top of the page this is where you can jump to reports and find tools necessary to reconcile the day.

Let’s take a closer look at the Title Bar on the Daily Recon Page:
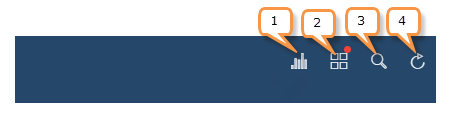
- Reports- Use this to quickly search and open a Report in Prime, this is the same function as on previous pages.
- Action Button- Gives you access to export the information to Excel, Print, and Approve/Un-approve the day.
- Search- Use this to choose new search criteria for the Daily Recon page.
- Refresh- Use this to Refresh the page information
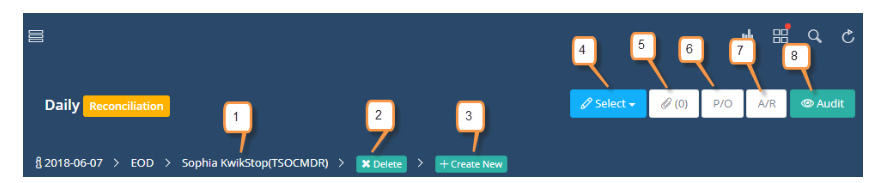
- Date and location – Sales data will be displayed for the date and location you see here.
- Delete selected day – Sales data will be deleted from the selected day.
- Create new day – A blank day will be created to enter data manually.
- Select day – Choose individual day from the specified date range.
- Attachments – Upload or view attachments.
- Accounts payable – Apply details for cash payouts performed at the POS for vendors/suppliers.
- Accounts receivable – Apply details for pay-ins, house accounts, local accounts, etc. for account/customer charges.
- Audit trail – See recent user activity.
Fuel Sales
Information and basic calculations for gallons sold and dollars collected by grade.

- Fuel Grade – List of fuel grades that have been set up in s2k.
- Sales Quantity – Gallons sold for the corresponding grade on the specified date.
- Sales Revenue – Total dollar amount (including discounts) that was collected for the corresponding grade on that day.
- Adjustment – Includes your pump test if necessary.
- Retail – This amount is figured by dividing the gallons by the dollars sold to give you the average retail for that grade on that day.
- Net Retail – Subtracts the fuel sales tax from retail.
- Cost – Your current fuel cost based on weighted average cost. Includes purchases, sales, and over/short.
- Margin – Difference between net retail and cost. (In cents)
- Profit – Margin multiplied by sales quantity.
- Edit – Allows you to add, edit, or remove fuel sales data manually.
Store Sales
Here you will see the sales by department and item level with margins. The information displayed here can be adjusted by clicking the edit button in the top right corner of this section.
You can view SKU details for any department by clicking on it.

Click on any of the headers to sort the columns alphabetically or numerically.

1. These are your Headers, when clicked they allow you to sort the field by that option. Ex: If Department is clicked, this will sort by Department Name Alphabetically.
2. You will see this Arrow symbol to indicate if you are sorting that column in an Ascending or Descending order.
In the Store Sales you may see a Red Square Icon. This indicates that the data has been modified. Hover your mouse pointer over the icon to see the original number.

The red circle icon indicates that the SKU sales do not match the department sales. Hover your mouse pointer over the icon to see the difference between the two.
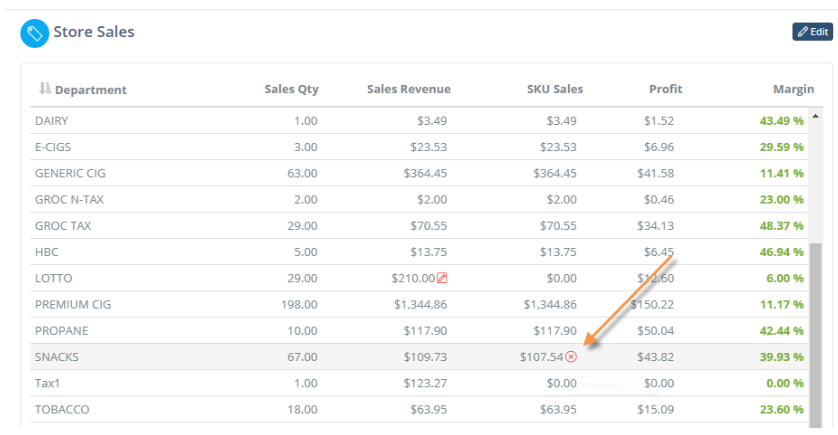
This can be caused by items in different departments in S2K vs the POS, it can also be caused by making department sales and not at item level. This can also mean you had sales of items that do not exist in S2K.
Receipts
This is where you will find the accumulation of transactions to account for the total sales for the day(s).
You can adjust the information shown here by clicking the edit button in the top right corner of this section.

The Receipt Types will then become editable. Any Receipt Type you would like to remove from the day in full, you can edit the amount or click the red minus to delete it from the day.

For each change you make, the system will prompt you to include a reason for the alteration. Place your note, and then select OK. You will then select Save to place your edit reason.

The edits can then be seen under the Audit button at the top of the page.

The red circle icon indicates that the details for this method of payment have not been balanced. Hover your mouse over the icon to see the amount that is over or short. You may need to check your P/O and A/R for the day to reconcile this.
