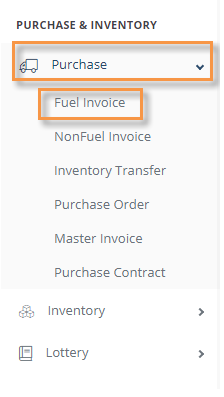
Click the “Fuel Invoice” link located in the Purchase drop-down menu.

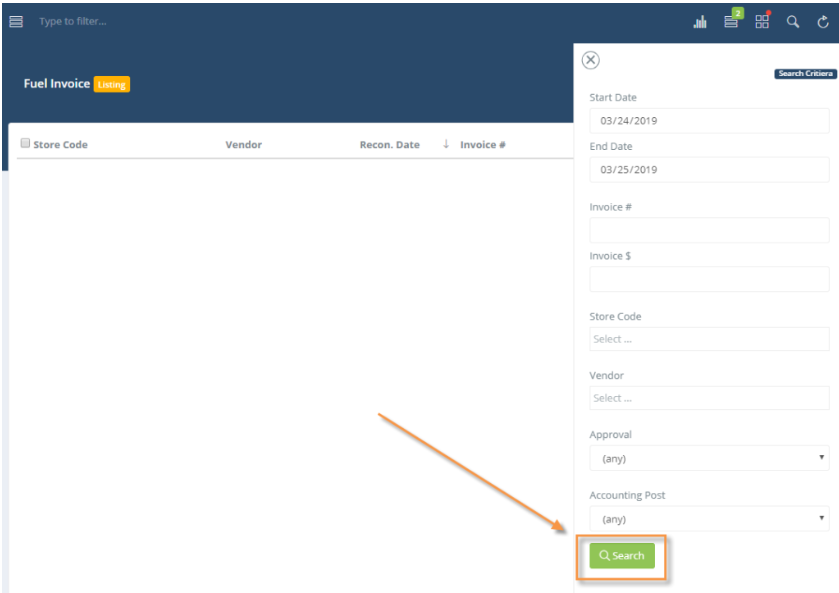
When you click the Fuel Invoice tool a search criteria window will appear. To create a fuel invoice, click the “Search” button to access the Fuel Invoice Listing Window.

The Fuel Invoice Listing window will appear. Click the “+New” button in the top right corner of the window.

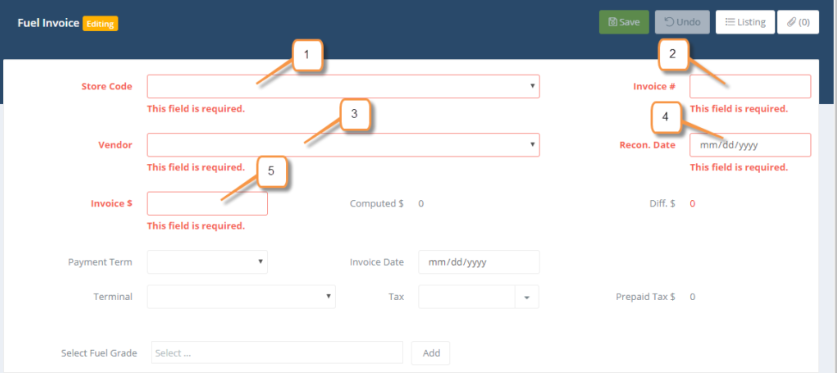
A blank fuel invoice window will become available for you to edit.
The empty fields that appear red are required and must be filled in prior to entering in the items received. The Fuel Grade Lines will not display until the required fields are completed.

- Store Code – Select receiving store from the dropdown list
- Invoice # – Type in the vendor assigned invoice number (or type in a unique number, such as the date. EX: 012919
- Vendor – Select the delivering vendor from the dropdown list
- Invoice Date – Date of delivery – type it in or select the date fro the dropdown calendar
- Invoice $ – Cumulative total amount charged by vendor
Additional Fields: Payment Term, Invoice Date, Terminal, Tax, Prepaid Tax $ and Select Fuel Grade and available for your business needs, however they are not required fields when entering in an invoice.

Once the required fields have been completed, the Fuel Grade Lines will be available for completion. To add items to the invoice click in the field on the desired fuel grade line and enter the information.

- Fuel Grade – The fuel delivered to the station
- Billing Quantity – Enter the Net or Gross amount of delivered fuel – depending on how you are being billed
- Other Quantity – Enter the Net or Gross amount of delivered fuel that is not how you are being billed
- Unit Cost – Enter the Price Per Gallon for the fuel grade purchased
- Amount – This column will auto calculate for you upon data entry
- Gross Amount – Click in the box if you only have a gross amount
- Tax – This will auto calculate the purchase taxes for the fuel grade purchased
- Charge – This is where you would enter any miscellaneous charges for the fuel grade purchased
Continue adding information to the invoice until complete and difference shows $0.

When finished, click the SAVE button and the invoice will be added to the system.

